The Tutorial Trials: Expert vs. Beginner Crochet Review
By: Olivia Cannon and Audrey Jones
Each crochet object hangs over a podium surrounded by cameras—who is going to come out on top? Pattern designers: Crochetkit or SGIBYN (tutorials makers), the battle for the best plants begins! What’s happening you ask? We are rating crochet YouTube tutorials. One expert and one beginner in a battle to find the best crochet hanging plant tutorial YouTube has to offer.
When you think of crochet, you might think of a group of grandmas sitting around in a circle, gossiping. But we are NOT grandmas, we are seniors in high school. During the covid lockdown, young people rediscovered this hobby and spread it across social media, making it popular again. This trend didn't stop there; it became bigger and better. There are now thousands of influencers all across YouTube, TikTok, and Instagram, and other social media platforms, whose entire content is based around crochet. This new wave completely changed how people learned to craft. Instead of skimming through pattern books or searching through websites to try and find the pattern you will have to buy, these influencers made crochet more accessible than ever.
Today, if you want to learn, you can pull up one of the hundreds of tutorials and learn how to crochet in a matter of minutes. After you learn, you can shift over to the thousands of crochet tutorials and get walked through a pattern step by step, all for free and on one website.
For this article, we, as a beginner and an expert, are going to be trying the same two YouTube tutorials for crochet hanging plants and rating them.
For those who don't know, crochet is a fiber art different from knitting. You use a crochet hook to make stitches by pulling loops of yarn through itself. With this process, you create a piece of fabric that can be formed into many projects: sweaters, stuffies, and blankets. The most significant difference between crochet and knitting is the tool; with crochet, you use a hook, and with knitting you use a needle. Now that we are all on the same page, let us introduce ourselves.
I’m Audrey Jones, a senior at Jenks High School. I learned to crochet five years ago—during the COVID lockdown—using a book that taught me how to do the basic stitches, read abbreviations, and symbols. Most of my projects are finished or just have ends to weave in (haha, that’s never gonna happen), but I do have too many WIPs (works in progress) and way too much yarn—it’s a problem, it’s taking over my room—with two bins, and three bags of yarn. I have never successfully used a YouTube tutorial to crochet; for the past five years, I have used written patterns to create crochet projects. As of this year, I tend to freehand and create my own patterns, like my frog bag! I tend to alter patterns to make the final result more my style, but I will stick to the tutorial…or at least try my best… stitch by stitch, to give an accurate review on whether the instructions are truly easy to follow.
My name is Olivia Cannon, and I’m a senior at Jenks High School. Audrey introduced me to crochet last spring, and I have only been crocheting for about six months, but very inconsistently. I have only successfully completed about five projects. I have about five thousand unfinished projects and an overflowing box of yarn in the corner of my room. I am bad at sticking to the directions and tend to start doing my own thing once I get bored, but I am going to be trying my best to follow every step. I learned how to crochet entirely using YouTube tutorials, and the most important factor for me when I decide if I like a crochet tutorial is whether or not the instructions are clear and actually beginner-friendly if it says that it is.
The most important part of rating these tutorials is making sure that we are rating them fairly, so we made some criteria. Here is what we are grading each crocheted plant on:
Instruction: Are the instructions clear?
Time: How long did it take us to make this?
Picture: Does the finished product look like the picture?
Difficulty level: All of these tutorials claimed to be beginner friendly are they really?
Critiques: If we wrote the pattern, how we would do it differently, or just any leftover complaints that have not been said.
We will each rate the pattern based on the criteria of the five categories and get a rating of 1-10, so the maximum one person can rate is 50 points. Then we will add our scores together, so that the perfect pattern would receive a 100.
Project One 55/100

Photo Credit: Youtube
Crochet Hanging Plants by SGIBYN Crochet Tutorials.
Instructions:
Olivia’s rating: 6/10
The instructions were very very clear but unnecessarily clear, at one point they said something like “next we are going to do a double crochet and if you don't know how to do this you can refer to my video (name of video that I don't remember) and then return once once you know how” and then proceeded to spend OVER EIGHT MINUTES explaining how to do a double crochet. That is annoying, but fine if it was only one time. Then she explained how to do a double crochet multiple times again in this tutorial. They also did this for a magic circle (a type of stitch used to start round projects) every single time you needed a magic circle, which was a lot, they reexplained how to make it. They were also doing the magic circle in a really weird way that made doing it more complicated, which I couldn't even get to work, so I had to ignore their instructions and make it the way that I learned. It is one thing to explain what to do and how to do it, but it is another to explain how to do every single stitch like a lady. I've been doing this for three hours already. I KNOW HOW TO MAKE A SINGLE CROCHET. PLEASE MOVE ON.
The instructions are given by this robot's text-to-speech voice, which is the most annoying thing in the world! Trust me, I have two younger brothers, so I am very familiar with annoying things, and this was very, very annoying. The horrible robot voice got stuck in my head, and I started reading things in that horrible AI-sounding voice. And if you try to avoid the voice and just look at the instructions that she had written at the top of the screen, you would mess up because she would not write all of the instructions up there, so you couldn't even escape the voice if you tried. Another issue was that the instructions she had written at the top were in different colors for each video, and when you went to pause it while you crocheted, her hand would often be in the way, making it really difficult to read the text.
Another issue is whenever we were making the leaves after explaining how to make them, she just said, “Now make three or four leaves for each vine.” HOW MANY VINES ARE THERE? YOU FORGOT TO SHARE THAT PART. I had to look at the picture to see.
After all of that complaining, here are some positive things. If this is your first project or you are very new, this tutorial could be very helpful. She seems to make sure everything is explained overly well, and that can be a very helpful thing for some people. This tutorial also has two videos, one for left-handed instructions and one for right-handed instructions, which I thought was really cool because I have never seen that before. I am right-handed, but I could see that being really helpful visually for someone who is left-handed, like Audrey. For all of these reasons, a six out of ten.
Audrey’s rating: 6/10
The Hanging Plants pattern was very clear, almost unnecessarily so, in how to do every single stitch used in the pattern. The video showed how to do magic circle/ring (mr), chain (ch), slip stitch (slst), single crochet (sc), half double crochet (hdc), double crochet (dc), increase (inc), decrease (dc), and back loop only (blo). Some techniques and stitches, like the magic ring, single crochet, and double crochet, were shown how to do MULTIPLE times.
The formatting of the pattern is very inconsistent, with most of the instructions being in red in the top left corner of the screen, but some instructions were put in the white text that is read to you at the bottom of the screen. (And if you turned on subtitles, it was subtitles on top of subtitles). The white text is text-to-speech with a feminine, robotic-sounding voice, which got so annoying that my ears hurt and I had to turn off the sound.
The pattern is broken down into multiple videos and compiled into a playlist. The first video, The Basket, has chapters in the scroll bar, which helped me move quickly between rounds, yet that format did not carry over to the videos that followed. The format between the specific videos for Type D was inconsistent, whether they would show every stitch in the round or have you fast forward—with NO time stamp—once you have completed the round.
Two positive things: I loved the way there were both left-handed and right-handed tutorial videos and the chapters!
For all these things I have said above, I rate the instructions a six out of ten.
Time spent:
Olivia’s rating: 4/10
I spent six hours and thirty minutes, which feels insane, but I have also never timed something I crocheted before. I think that almost half of my time was spent sewing things together, which, for a crochet project, I also hate that there was so much time spent weaving in the ends. I give this a four out of ten because this project did not seem like it should take six and a half hours, and I did not feel like what I got from that time was worth it.
Audrey’s rating: 5/10
Six hours and forty-five minutes is wild for how small the final product is. Yet I’ve never timed a crochet project. I count by days, like I’ve been working on this project for X amount of days, but I’ll work for about an hour at a time. I’m no stranger to long projects, but just looking at the time on the stopwatch hurts.
I would say two-thirds of my time was spent weaving in the yarn tails. I thankfully had an amazing tapestry needle, which made it bearable, but it still was NOT FUN.
Picture:
Olivia’s rating: 3/10
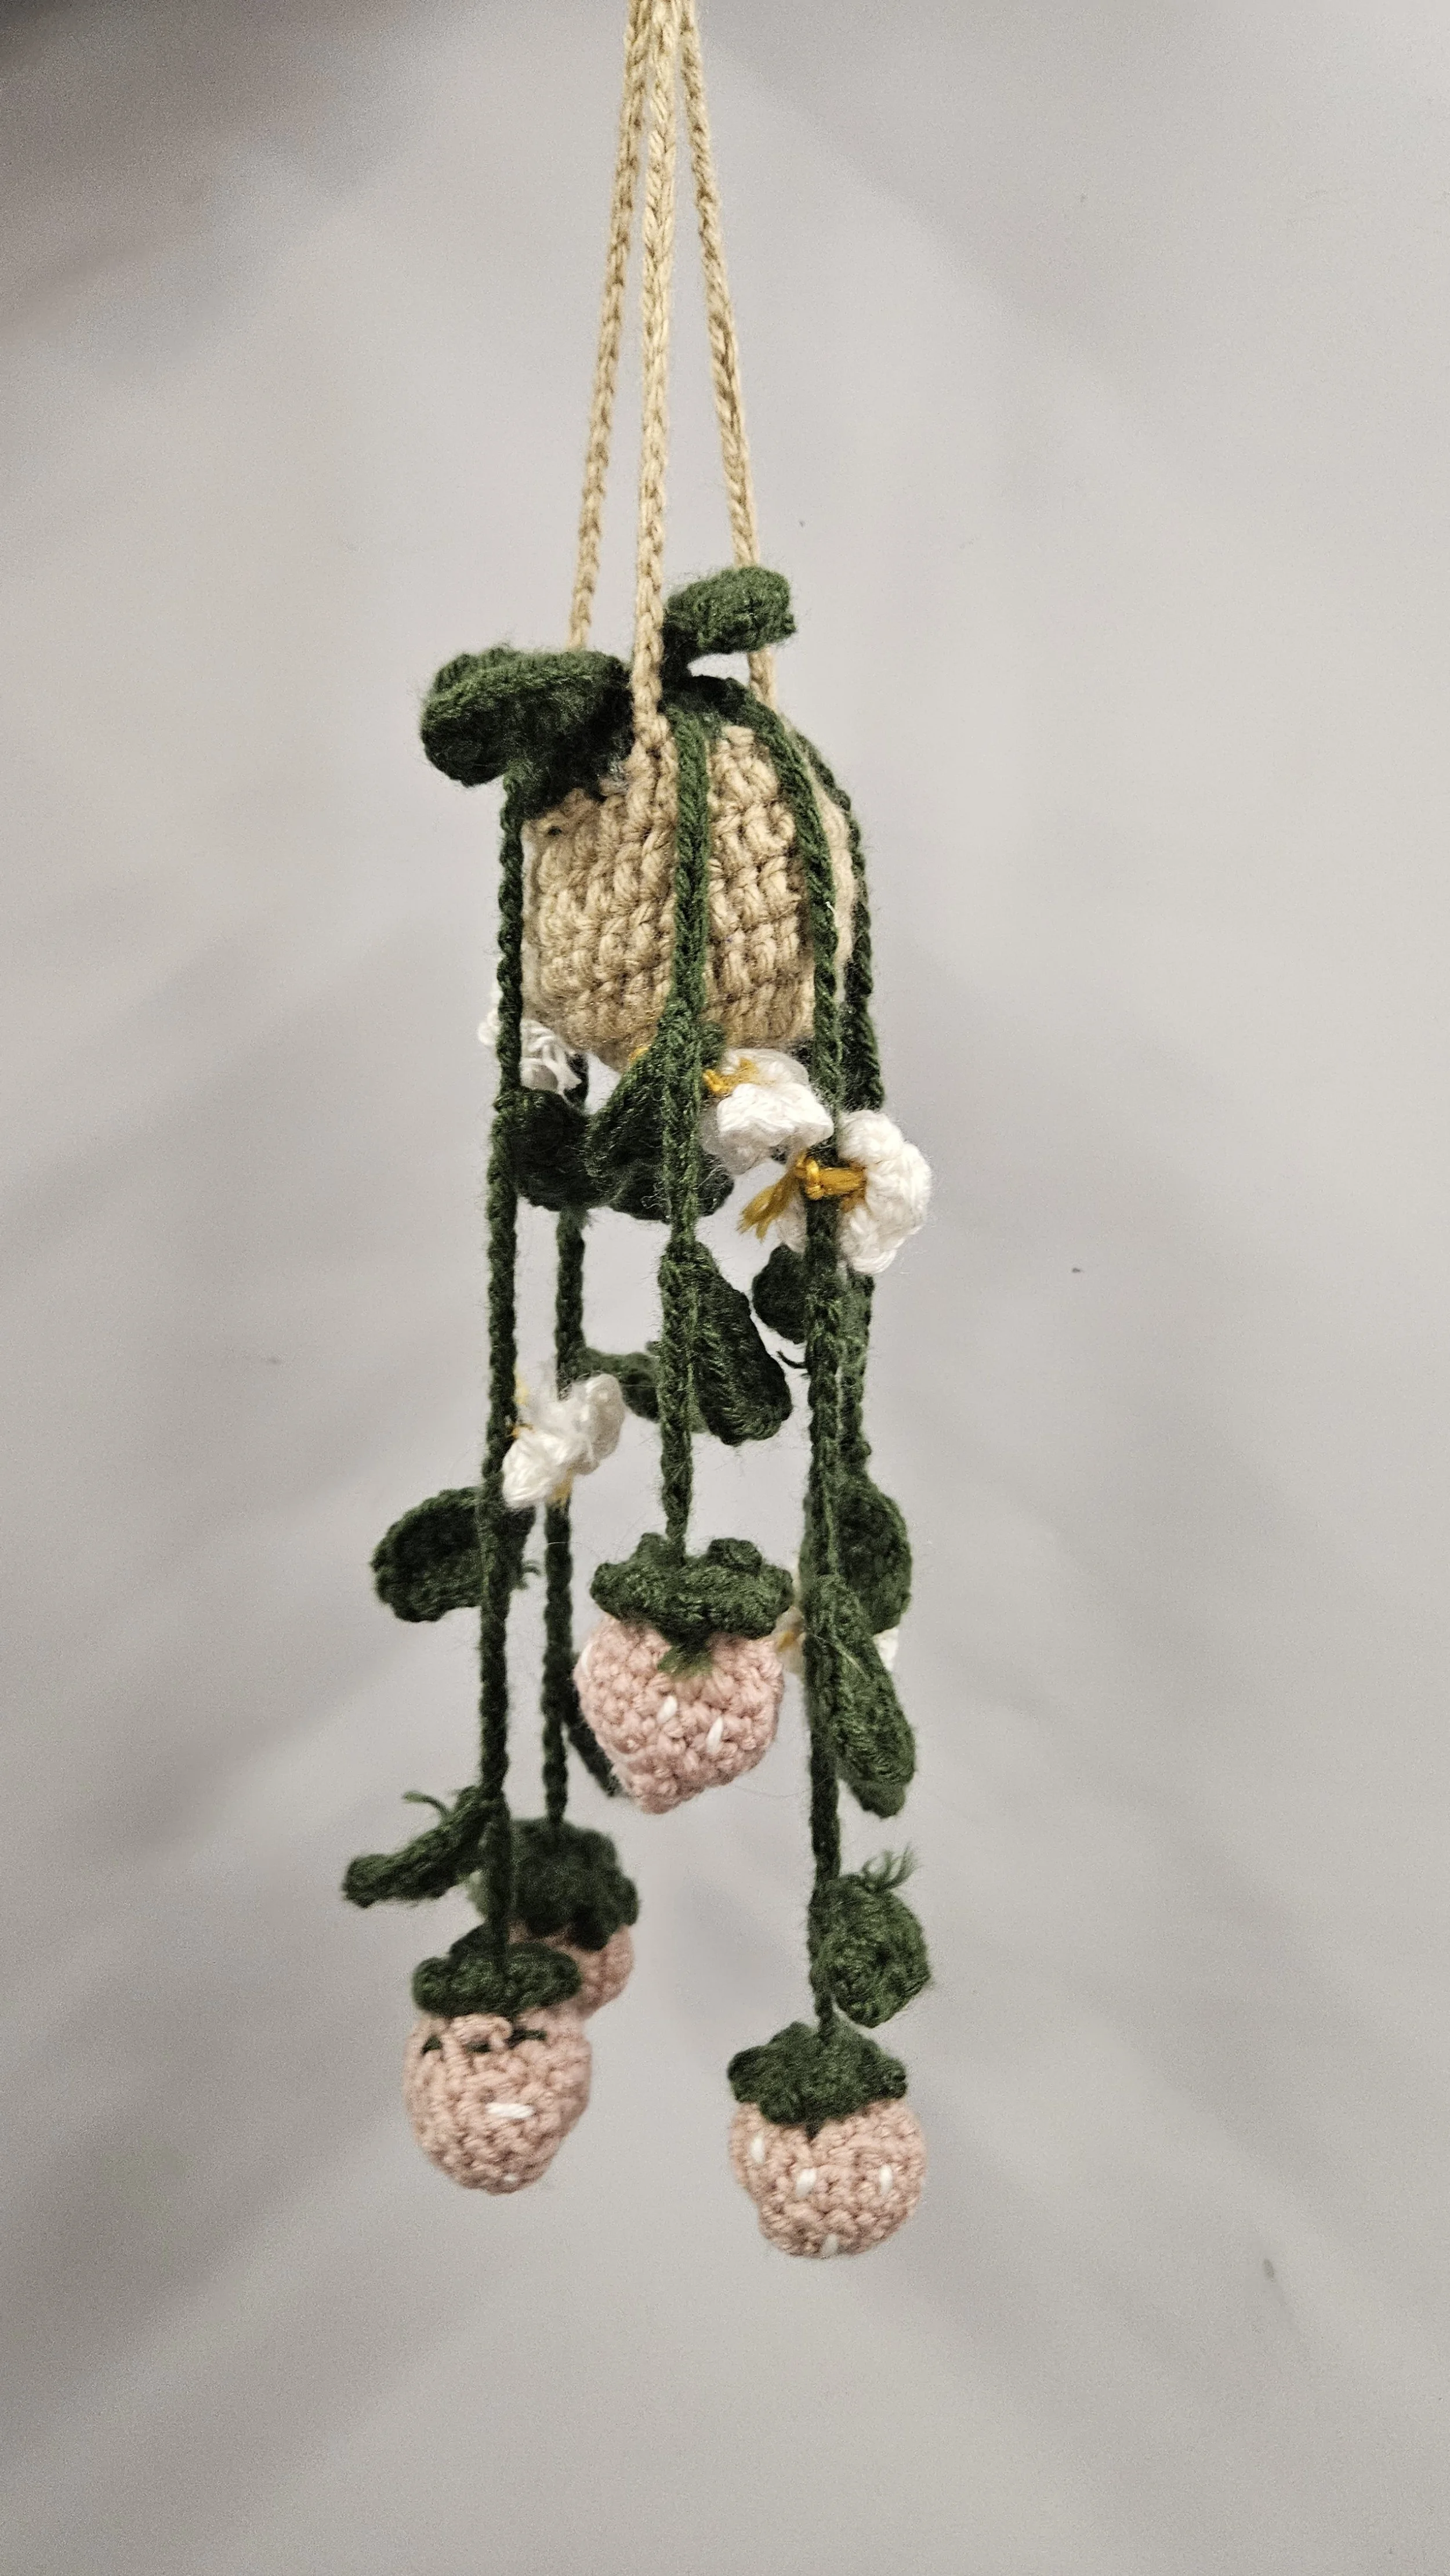
Olivia's hanging plant from tutorial one.
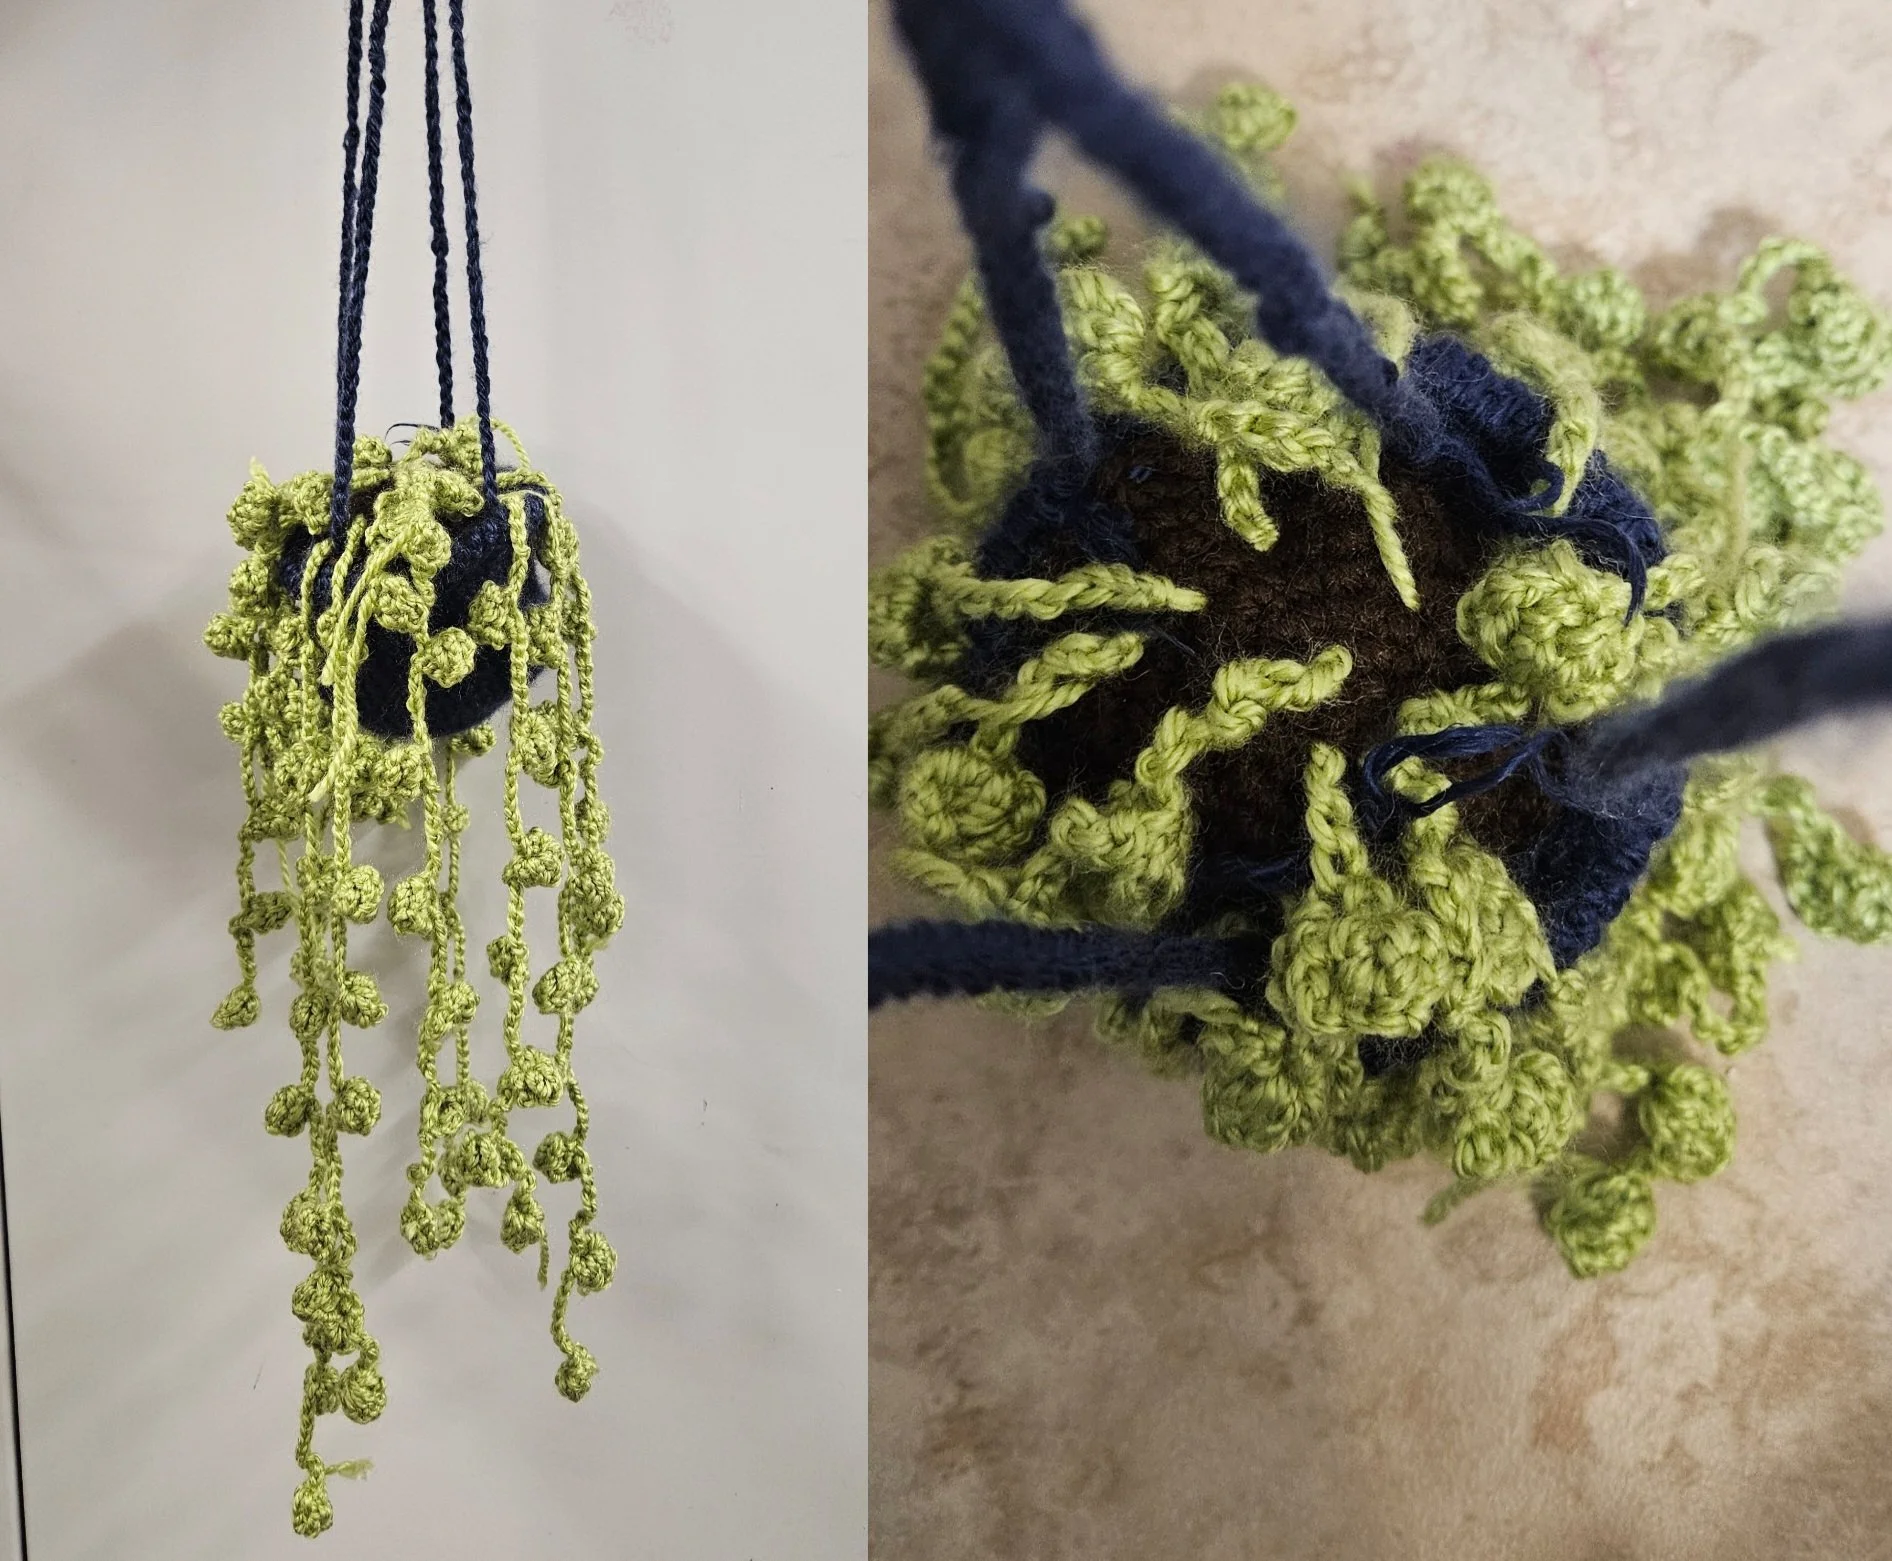
I used light pink yarn because I did not have red, nor did I want to go buy any, so we are all going to have to pretend that my strawberries are just not ripe yet, or that they are one of those albino strawberries. My vines look a lot longer than theirs, even though I’m pretty certain I did them the right length, so now they look freakishly long. I also could not get the thing to hang evenly because there are three sections and five vines, so the weight is not being distributed evenly, so the whole thing is leaning sideways. I have no idea how they go there to curl up all pretty like that, but mine stick straight out like they are reaching to steal your ugly soul with their fat fingers, and I don't want to look at them ever again. My flowers looked depressed, and like they are not alive at all, they are all looking downward instead of out like the tutorial's photo. My strawberries also don't look the same as hers, mine are shaped like radishes, which are weird misshapen balls, and my pot, I thin,k is weirdly shaped, but I am not certain if that is just my opinion. I also think that the seeds don't look good and take way too much time for how unnecessary they are. Three out of ten because mine actually looks so strange, everything is just slightly off, AND I CAN'T EVEN GET IT TO HANG RIGHT, AND THAT IS ITS ONLY JOB. Side note, I am going to pretend it is cute and that it looks perfect, so that I can give it to my sister for Christmas, so I don't have to buy her anything.
Audrey’s rating: 4/10

Audrey's hanging plant from tutorial one.
I completely missed where it said to make and add leaves at the top—oops, my bad. My proportion of the vines to the pot is off, the vines are too long, and the pot feels a bit skinny. Surely I did the vines right (I rewatched the vine part at least four times. Four. Times). It was so strange that there were five vines with four sections—one vine for each section, except for one section with two vines. Did you expect the basket to hang balanced with UNBALANCED vines?—I don’t know how it works, but mine hung for the most part evenly. WHAT WITCHCRAFT DID SHE DO TO GET THE LEAVES CURLED? Like, how am I supposed to replicate that? I wanted curled leaves…it looks so pretty. But no… I don’t know how to do it. My flowers look wilted, they’re dying, and it’s so sad because I liked the idea of the flowers, but the execution was not there.
For the reasons above, I give the plant a four out of ten.
Difficulty:
Olivia’s rating: 7/10
This pattern is beginner like it says. It does a good job explaining to the point where it might be too much, but it also skips over how to do a couple of things, like weaving in ends, which this pattern does a lot of. I think that if this were my first project, I would never finish it, not because it is too hard or it doesn't teach well, but because of how much unnecessary time was spent sewing pieces together, which wasn't taught well and can be difficult for very beginners. Overall, I will give it a seven out of ten.
Audrey’s rating: 8/10
To me, this pattern is geared towards an absolute beginner, someone who only knows how to hold the hook and yarn, instead of a beginner. A beginner is someone who knows the basic stitches (everything the video uses minus the magic ring and back loop only, which they called something else). The stitches would only need to be explained the first time they are used for the whole project, AND THAT IS IT. None of this shows the stitch every. time. it. appears.
The sewing instructions were unclear or just missing entirely at some points. This pattern neglects to teach you how to weave in your ends, especially when making the leaves—those leaves are going to be the death of me, crochet, cut, sew. Crochet. Cut. Sew.— I was unsure how you were going to sew the leaves to the vine, on the vine, without the strawberry, as that part of the pattern was missing, though it could be assumed using the strawberry vine as an example.
This pattern was an eight out of ten, very easy for an absolute beginner
Critique:
Olivia’s rating: 6/10
I really did not like the way they made the vines in this tutorial. You make all of the leaves separate and then tie them onto the vines, but there are other ways where you could crochet the vine as you go, crocheting the leaves at the same time. They would leave you with no ends to weave in, but instead, she made me spend way too long tying leaves onto a vine and hoping that they won’t fall off. She then proceeded to make me weave in so many ends, which I don't think she actually ever explained how to do. I think she just told us to do it and then move on. Also, the voice was horrible. Because of this, I'm giving the tutorial a six out of ten.
Audrey’s rating: 6/10
I have issues with how they taught the magic ring, because it was the most difficult way I have ever seen. Below is a better explanation:
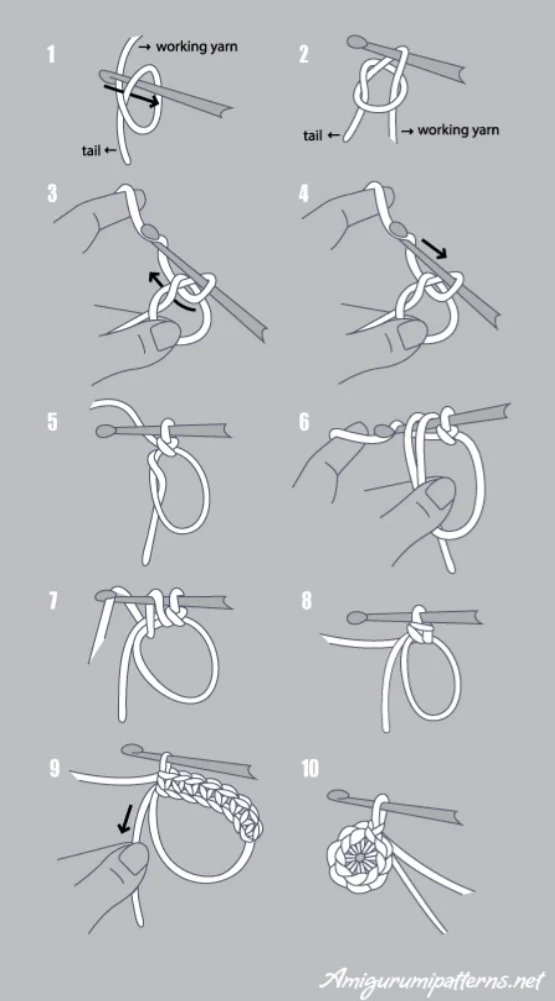
Photo Credit: Amigurumi.com
Easy to follow magic ring tutorial.
The leaves and vines were crocheted separately, which added more sewing. I personally would have liked to crochet the vine and the leaves together as one piece.
Project Two 70/100

Photo Credit: Youtube
Hanging plant tutorial.
Instructions:
Olivia’s rating: 9/10
The instructions were very clear and did a great job of explaining things, but did not do it too many times. In the first video, whenever you were learning things, it showed you how to do the stitch once and then showed a slowed-down version, and explained it in a different way in case the first one did not make sense. Although it did say at the beginning of the video to go watch the basic stitch tutorial and learn all the basic stitches before you start this tutorial, I felt like it could have been slightly unnecessary to explain some of the things, especially a single crochet. This tutorial also made the magic ring weird. I feel like they did a better job explaining it than the first tutorial did. At the beginning of the video, it also said something about needing an instructional brochure, but it didn't say where to get i,t and it did not use it ever in the tutorial, so I have no idea what it was talking about.
The tutorial did not explain how to do every stitch every single time you did it like the last one, but at the start of every round it re explained what you are doing and walked you through it, like when we were making the base of the pot the next round might be “sc, sc Inc, sc, sc” (single crochet (SC), Increase (Inc)) and instead of just saying that this is what you are going to do, and maybe doing one set of it she would go through either the entire round with you or at least three to five sets of it before skipping ahead which it seems she rarely did, The rarely skipping ahead made the videos unnecessarily long and extremely boring to watch. I did end up fast forwarding through the parts where she explained what to do every single stitch because I CAN READ AND THE INSTRUCTIONS ARE WRITTEN ON THE SCREEN, and even if I didn’t understand what they meant, YOU ONLY NEED TO EXPLAIN IT ONCE, MAYBE TWICE. PLEASE STOP TALKING. IT IS NOT HELPFUL.
One positive thing, though, is that the video had really good written instructions. At the top of the screen, it explained what you are doing for the row that you are on, and along the bottom, it had what the lady was saying written, but you do have to make sure you don't have YouTube captions on because those will blend together and make it extremely difficult to read either of them. Overall, I think this is a really good tutorial that could explain a little less, but still gets a nine out of ten.
Audrey’s rating: 9/10
I had a lot more problems with this hanging plant when I came across missing instructions. (That was definitely a me issue). The video taught you how to do a magic ring (mr), chain (ch), slip stitch (slst), single crochet (sc), treble crochet (tr), and increase (inc). These stitches were each shown twice, once at a normal speed and once slowed down. Along with the demonstration, there were very clear written instructions on how to do each stitch—I love written instructions: yarn over pull through…The video opens with a warning:
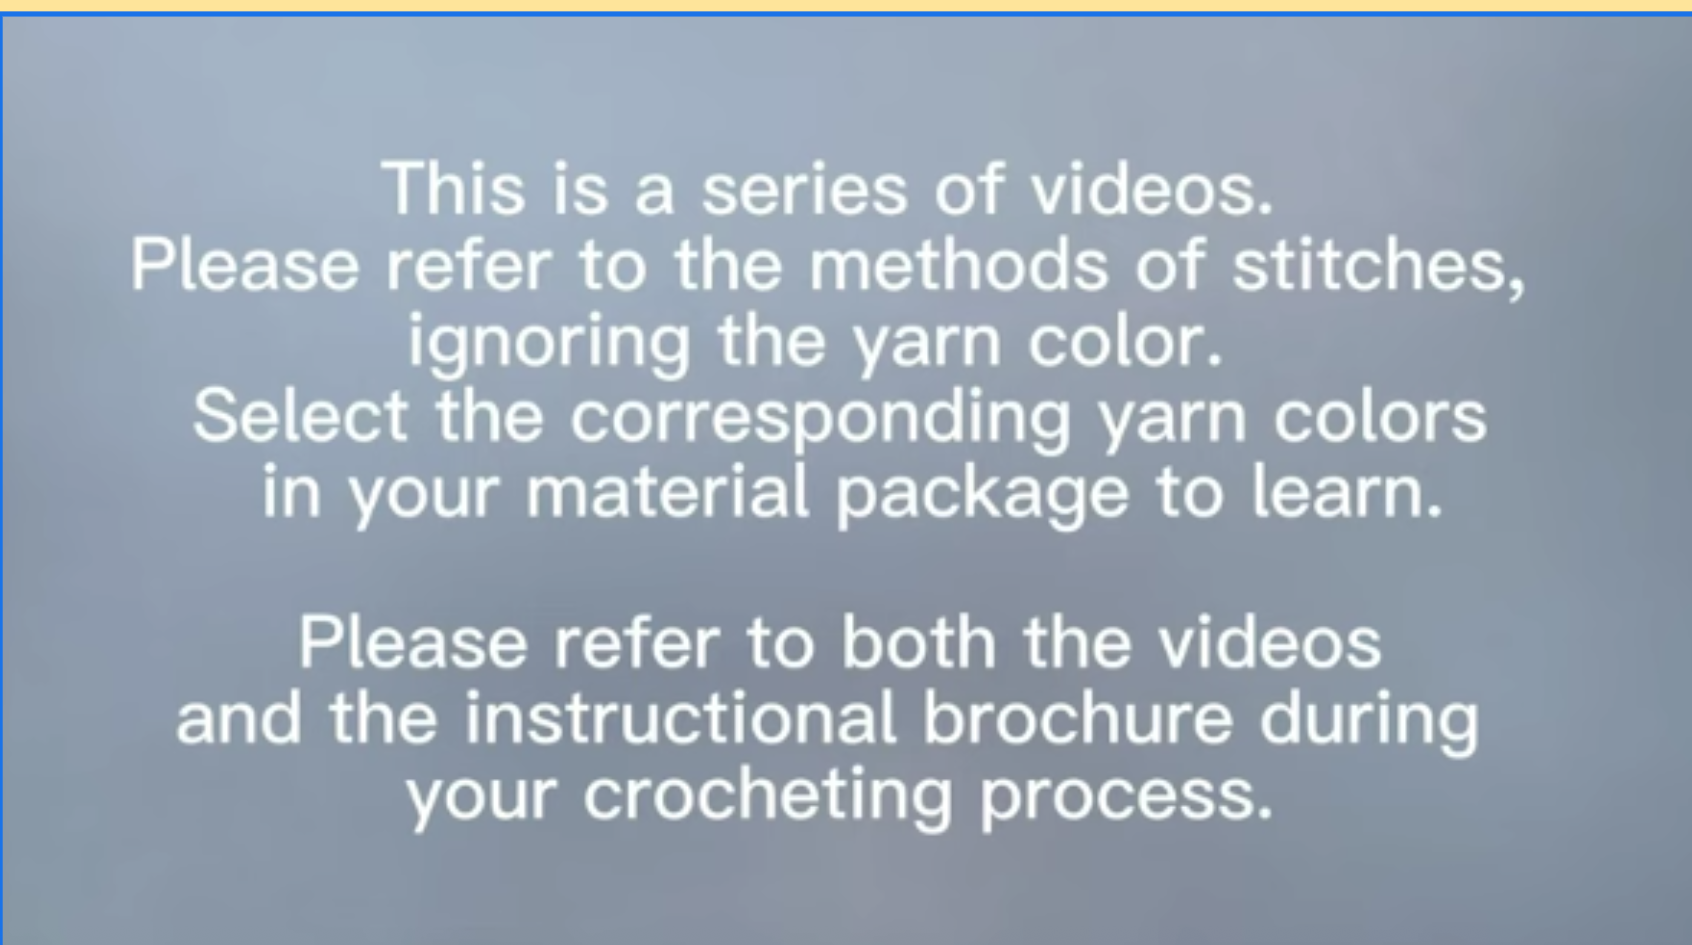
Photo Credit: Youtube
Screenshot from the first video of this playlist.
Neither Olivia nor I had a “material package”. BUT I did love that it was a series of videos broken down by piece, and then one for assembly. The clarity was consistent through each video, as well as the format of the instructions. Quick abbreviated instructions were written in the top left-hand corner, and fully spelled out instructions are at the bottom with the abbreviations included (so you can learn them by exposure).
Overall, I would give it a nine out of ten.
Time spent:
Olivia’s rating: 3/10
I spent just under six hours making this disturbing plant, which seems like way too much time. Although the time did feel to go buy a lot quicker because I did not spend 90% of it sewing, which made it a lot more fun to do. Although this one took less time, it is way uglier than the other one, so I will rate it a three out of ten because I spent six hours of my life making this plant just to turn out to be extremely ugly. I hate it so much.
Audrey’s rating: 7/10
Six hours is a nice even number. A third of the time was spent crocheting the pot, which was mostly all single crochet—it took longer than double crochet, but... NO GAPS FOR STUFFING TO SHOW THROUGH—I never got bored (which is a hard thing to accomplish), the pattern was very diverse in what we are crocheting.
Picture:
Olivia’s rating: 2/10
Olivia's second hanging plant.
I swear it did not say in the instructions that when you are attaching the vines, you need to pull them down and start at the leaf. I even went back and looked, and it does not even do that, so it is a mystery to me how both the tutorials and Audrey's have so many leaves on top. I swear I have enough vines. I counted several times. So now my plant is left looking like it's balding. Another point is the tutorials leave look like cute little bubble,s but mine look crumpled up and hideous. The vines keep getting tangled together, and I hate how they look. The lanyard thing that hangs the plant is also way too long, like almost a foot long. It does not make sense at all for it to be that long; it looks weird and hangs funny.
Side point not related to the scoring I had planned to use that cute light brown color for the basket that I did on the last one, but Audrey was like “Olivia dont be boring do a colored pot with me” and I told her “no I know the brown will look cute, but a color might end up looking ugly” and somehow she convinced me to do navy blue and I was so right. The pot looks hideous. I hate the color. It doesn't look right.
Another thing, my dirt looks lumpy and sticks out. I do not know how my dirt ended up bigger than the pot, but it did. I thought I did the increase right, but somewhere, probably when I was sewing them together, I messed up, and it caused the dirt to stick up weird and not fit over the pot right. Maybe that makes it more realistic, right … dirt is normally lumpy, so mine is just more realistic.
Back to the vines, mine literally is balding. Why does it look like it has way fewer vines than everyone else’s? Other peoples’ are thick, luscious, and beautiful, but mine you can see right through to the pot. It looks like when you get old, your hair gets super thin, scraggly, and stringy. It also reminds me of when my sister would scoop algae out of a lake with a big stick and fling it at my brothers or me. The way it hangs out of the pot is the exact same way that the algae would hang off the stick. It disgusts me, and I'm scared of it, and I get a deeply uncomfortable feeling when I look at it. Overall, two out of ten.
Audrey’s rating: 6/10

Audrey's second hanging plant.
I’m proud of my final result! I think it hangs very nicely, with how the vines are situated. But why do my vines come out from everywhere? In the picture, they seem to be hanging in two sections, not all four.
Difficulty:
Olivia’s rating: 10/10
This tutorial was very easy. I think someone brand new to crochet could complete it. The plant might not look great, but it will be easy to do and make sense. The only part that was difficult was sewing the lid. Overall, I give it a ten and ten because the tutorial is very easy and helpful for a beginner.
Audrey’s rating: 8/10
Sewing will always be a challenge; this pattern was no exception. When sewing the vines to the soil, they told us to use a crochet hook—WHAT!? It was way more difficult that way—to pull the remaining yarn tail through the soil and tie it with another tail to secure it. (I personally would have used my tapestry needle, but fine).
Critique:
Olivia’s rating: 6/10
I did not like this tutorial much. The only thing that was really good about it was that the instructions were easy and clear, and that it was beginner-friendly. Now, for all the criticism:
The lanyard thing is way too long; it does not need to be almost a foot long. The instructions needed to make it clearer that you need to have the leaves at the top, or it will look ugly. I do not like the size of the pot. I feel like it is unnecessarily big; mine is the same size as Audrey’s, and it just looks like my pot is too big compared to how the vines look. I do not like that you have to sew the lid down inside the pot. I think that you could have done it on top, and it would have been easier and essentially looked the same. I don't like how they made the leaves. If you look at them any closer than five feet away, they are hideous, and sometimes they end up gaping away from the vine, which makes them look worse. I feel like there has to be a better stitch to make them look good close up as well as far away.
Overall, this project is great for beginners, but I personally think it looks ugly, or at least mine does. Audrey’s and the tutorials do not look as ugly as mine, so I will give it a six out of ten.
Audrey’s rating: 10/10
I didn’t find anything I would change in this tutorial.
Overall, I think we found that the YouTube tutorials really are beginner-friendly, but there of course are going to be some difficulties. However, that is because crocheting is difficult, and you will get better as you go and learn how to do things your own way. I think it was very strange to see that I (Olivia) crocheted faster than Audrey, but of course, hers always looked better, so I think we all realize taking your time and not rushing is really important. If you want to try out the tutorials for yourself or see many more, check out @crochetkit and @SGIBYN on YouTube.
Honorable mention to our sacrifice, Bungee the manatee, whom Olivia killed in order to stuff our plants. (She does not feel remorse.)
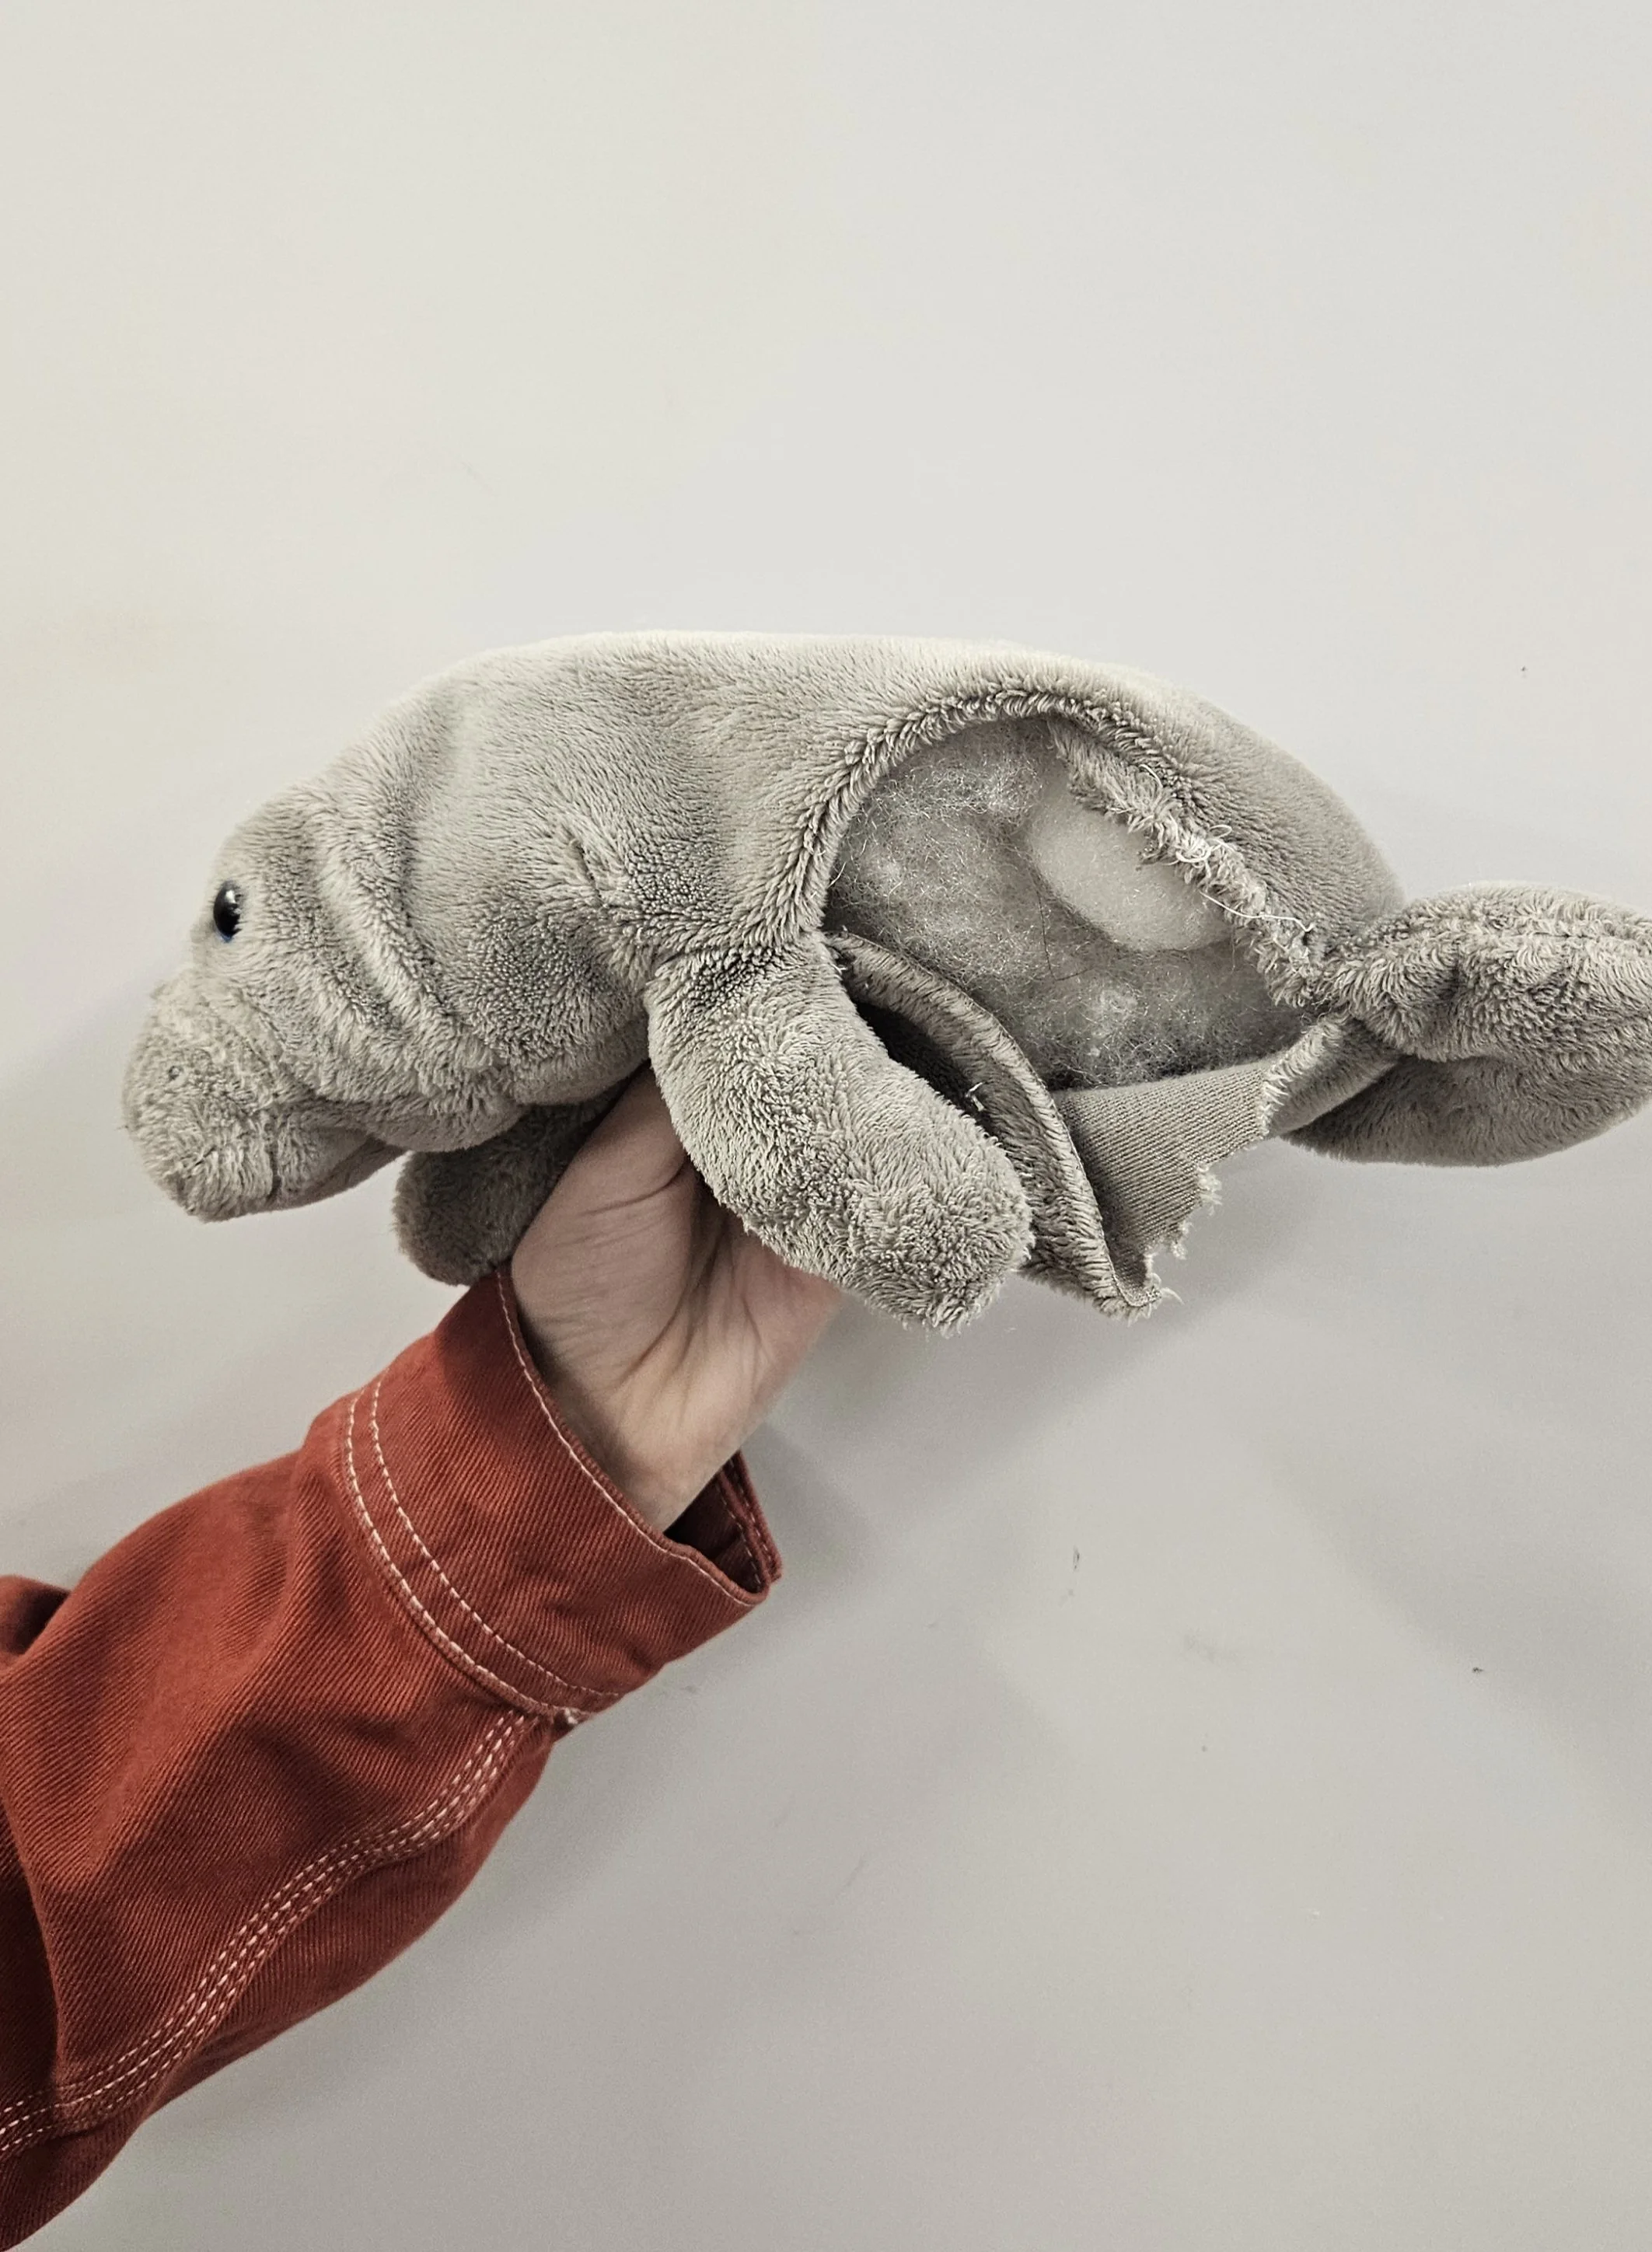
Bungee the manatee.